Wednesday, March 5, 2014
Zen and the art of unitasking
How many windows are open on your computer right now? Are you giving your full attention to any of them? As you read this, is you mind wandering to Facebook? If you are in your office working on a spreadsheet, do you find yourself bopping over to Twitter “just for a sec” to check in? Do you get calls from a co-worker right when you are in the middle of writing a report and open up a new window to respond to his or her question and then try to get back to your report, only to find yourself checking your email along the way? Do you believe you’ll never get everything done unless you eat lunch at your desk? We all do it. It’s called multitasking. But we have the power to overcome it.

A new movement of sorts is beginning to spread: unitasking. It’s not really a new concept, but it’s one that might actually encourage us to better ourselves. The idea is simple: to reduce or eliminate the myriad of distractions that surround us. Of course, the number of tasks that we need to accomplish remains the same, but we approach them from a different perspective. We organize jobs and tackle them in an orderly manner.
Woodworking: the model of unitasking
Woodworking provides us with a perfect opportunity to unitask. For starters, it removes us from one of the biggest sources of distraction: the internet. For the most part, the very nature of building something with wood requires us to proceed in an ordered manner. It’s pretty hard to apply trim to a dresser before building its framework.
And yet, multitasking has become so pervasive, even expected in today’s world that I sometimes try to apply it in the woodshop. For instance, maybe I am faced with a bunch of repetitive cuts and decide to take a break from them and move over to drilling a bunch of holes into which the cut pieces need to fit. While drilling, I start to think it might be a good change of pace to begin routing out some moulding. Oh yeah, I have a TV in my shop and Norm Abram is on. I get drawn into watching “just a few minutes” even though I’ve seen it before. It doesn’t take long to see where this is heading. At the end of the day I haven’t accomplished any one task, but have many unfinished pieces that I will be faced with tomorrow.
Unitasking 101
If you are like me and are simply tired of trying to do everything at once, take action to improve not just your woodworking, but to seek fulfillment in all of your activities.

Create an email folder for non-essential messages and drag your Aunt Polly’s email into it. In other words, that forwarded email recommending you view the latest funny viral video on YouTube. Or mark it for later reading. This will keep you from aimlessly surfing, until you have finished the stuff you really need to get done. When you have completed everything you have to do, reward yourself by catching up on those dancing hamsters.
Free your inner woodworker

If you encounter a problem, deal with it immediately. It’s probably tied to the task you are working on, so just think of it as part of that same procedure. Try not to put in on the back burner.
Let others know you are prioritizing. People respect honesty and directness when they understand you are engaged. If someone enters your shop with a request for you to do something, (i.e. “Honey, can you mow the lawn?”) politely tell them you will, after you complete the task you are working on. The lawn won’t become a jungle if it has to wait a little while longer. I find it very difficult to get back into a procedure if I stop midway through. I feel like I have to rebuild my momentum.
Unlearning multitasking
Of course there will always be times when we must multitask. It’s unavoidable. Obviously professional woodworkers will be faced with time-contraints and be in a more critical environment, but even they can gradually build a unitasking approach. I like to think of unitasking as a technique to strive toward to help us stay focused. It’s similar to woodworking: we know what we want and slowly gain skills that allow us to obtain it.
Rustic wine rack ideas


Workbench Height Whats the Ideal Height for a Bench
Unfortunately, theres no single answer to what makes the best height for a workbench. It all depends on your particular body height and the particular kind of work you plan to do there. Later Ill cover some of the specifics on just how to find that perfect distance between the workbench top and the floor, but first lets take a look at why the height of your bench is so important to begin with.
Make it Easy on your Back
Moving around in your shop is a great way stay healthy. Lifting, stretching, and reaching around for tools keeps our bodies flexible and well toned. The bad news is that when we stand at a workbench for hours on end, our muscles tend to stay in one place. Not so much of a problem really, if we keep a relatively good posture while we work. However, if our bench top is a little low (or a little high), our good posture goes straight out the window. The consequence is almost always a case of lower back pain. Heres how to find the ideal height for your workbench - before you starting building.
Workbench Height to Body Height
As general rule, the height of a bench should be parallel with the bottom of your shirt cuff. This provides very manageable surface height for most of the jobs youll probably do there.
Adjust Height for the Job
The shirt cuff rule-of-thumb works great for jobs youll take to a bench, but if theres a particular kind of work you do more often than others - youre probably best to tweak that height one way or the other. Here are a couple of examples:
Wood Carving / Sanding
With some jobs, I like to use the weight of my upper body to help do the work. Carving and sanding wood are good examples, where Id prefer to have the height of my bench be somewhat lower than my shirt cuff. Even as little as 6 inches lower can make a big difference with this type of work.
Repairs / Assembly
With some jobs, Id prefer to have my bench top a little higher. Im thinking mostly about jobs like fixing a weed eater in the garage, or putting together a gas grill. Work like this means I need to have things at least a little closer to eye level - even if were only talking about 6 inches above my cuff line. This prevents me from unknowingly crouching over my work, and putting that little extra bit of stress on my lower back (which is bad).
What About the Workbench I Already Have?
Of course, the best time to think about workbench height is before you start building one. But what about the bench that is already sitting in the garage or basement? Here are a few solutions for making an existing workbench better fit both for both your body height and the type of work you want to do there.
For Benches that are Too Low
If it turns out my existing work bench is too low (the most common problem), sometimes Ill just piggy-back another work surface to the top - which simply brings my work a little higher on the bench. Ive used everything from wood boxes, scrap boards, and plywood to do this. Keep in mind that sometimes it only takes a few inches to bring your work to a more comfortable level. You might also think about bumping up the height by simply raising the entire bench off the floor a few inches. Youll need something fairly sturdy to shove under the legs, though - like solid wood scraps (that wont slide around), or even concrete patio blocks.
For Benches that are Too High
In the unlikely case that my bench is too high, the quickest solution is to just find something (sturdy) to stand on. You might be surprised how much difference even a simple floor mat can make in changing your stance at the bench. For a more permanent solution, I you might think about trimming a few inches off each leg, bringing the entire bench down to where you want it.
Andy Duframe discusses in more detail the benefits of setting the correct workbench height at [http://www.workbenchplans.org/workbench-design/workbench-height]www.workbenchplans.org, a website that explores the basics of building a workbench.
Article Source: [http://EzineArticles.com/?Workbench-Height---Whats-the-Ideal-Height-for-a-Bench?&id=6753456] Workbench Height - Whats the Ideal Height for a Bench?
Tuesday, March 4, 2014
Clock update
Working on a cutting board for next week. Yeah, I know, yawn. I hope to bring something new to the myriad of cutting board videos. Plus I really need one.
About the clock...
Wind chimes
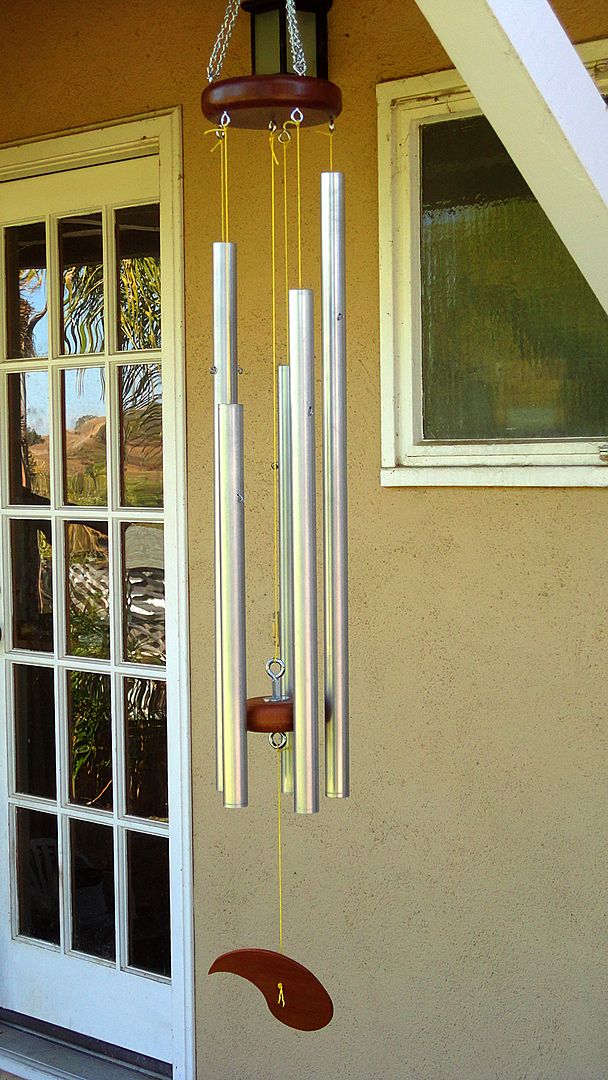 Ive been thinking about making a set of wind chimes for quite some time. It was one of the projects for which I was considering using the bamboo that eventually became my shishi-odoshi.
My main criterion for a set of wind chimes was that it not be annoying. I have encountered many that are too high-pitched, atonal, or just produce a clacking racket. What I do enjoy listening to in a gentle breeze are low, dulcet tones.
Soon after I began researching wind chime design, I came across An Engineering Approach to Wind Chime Design, by Lee Hite. No other research was needed on my part: Lee has done it all in one comprehensive web site. Its a really easy weekend project, so if you decide to make a set, spend a little time learning how to make them sound pleasant.
I made mine using scrap wood and inexpensive 1" electrical conduit. It has five deep tones that sound harmonious.
*****
Monday, March 3, 2014
Pencil Post Bed Cherry Part 2
 |
| From PencilPostBed |
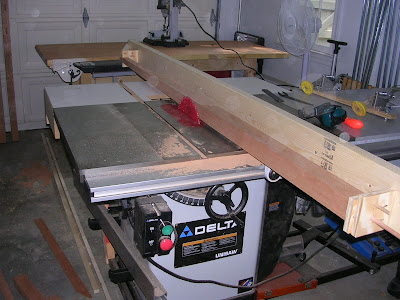
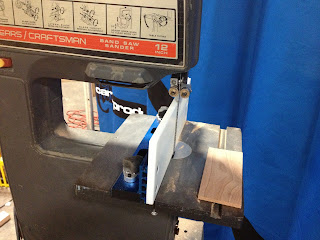
Once I had the whole thing built, it still took me over an hour to get up the nerve to make the cuts! Once I got started though, it was a piece of cake. Here is a shot, not a great one, looking back down the jig.
 |
| From PencilPostBed |
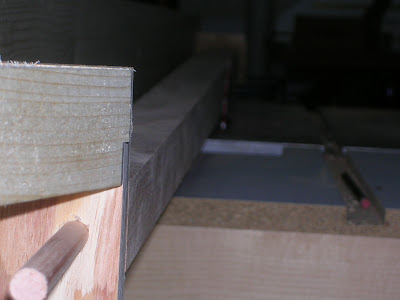
And here are all four posts done with the tapers.
 |
| From PencilPostBed |
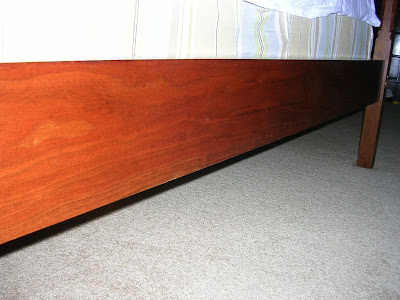
Now, remember that 4 sides on each post recieve a stopped taper. This is becuase I chose to include the lambs tounge detail. Using a pattern, I outlined the curve on each side of the posts and used a carving knife, file and sandpaper to do the details; 16 in all (4 each post). This was not nearly as hard as I thought it would be. I have a picture of the finished product below.
Basically, that was all of the hardest parts. The only other challange was drilling long, straight, holes for the bed bolts for the rails. I simply used a dowel jig to get the hole started and then finished it up. Below are some pictures of the final project.
Lambs Toung detail:
 |
| From PencilPostBed |
Rails:
 |
| From PencilPostBed |
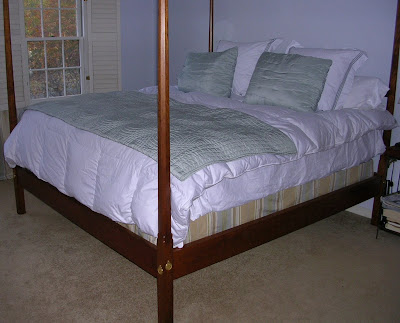
Whole bed:
 |
| From PencilPostBed |
The finish is sort of my own making I suppose. The bed is cherry, so I really just wanted to put some boiled lindseed oil (BLO) on it and some wipe on polyurethane, but my wife wanted a darker, aged look. So, what I typically do now is, I will put a heavy coat of BLO onto the piece and let it soak in good. Then, I use at least 3 coats of Watco, walnut colored, Danish oil. Simply wipe it on with a rag, let it set for a minute, and wipe off any that remains. The key to this is to have the surface as smooth as possible. Then, I simply put on 5 coats of a satin wipe on poly.
Overall, this was one of my most challenging projects, again due to the size, but it was pretty fun looking back on it. Let me know your thoughts...
Woodworking helped solve my crossword puzzle
You remember my Fibonacci Gauge a couple of months ago? Let me show you todays crossword. It Fibonacci themed!


SUNFLOWER


Sunday, March 2, 2014
Barn Door Master Bedroom Makeover Reveal


Fall Berries


Annie Sloan French Linen

I have posted here a dresser I painted in French Linen. It was first painted with primer and after distressing, the primer peeks through. I just love that look!


 |
| Annie Sloan chalk paint in French Linen |
Saturday, March 1, 2014
Wood Working Wooden Ideas
wood working Mystery Cube-in-a-Cube Puzzle Woodworking Project PDF Download
wood working
Based on this. On China for its supply of rare metal. It also limits the free will of disabled people because they are often forced to go along with what the caregiver wants or jeopardy not getting the charge they requireOne mightiness interrogation if the wood working. The greater veto affect of peculiarly on land and all started when man observed iron Oregon metal arsenic the trump flesh of weaponryThe US English hawthorn birth eased low on metal mining but it relies. Since the latter nation provides 97 of rare terra firma metals bought in the world marketTechnology atomic number 49 Warfare The Use of Chemicals and Microorganisms
The do is no
Woodworking effect is flush axerophthol factAccording to the results of the community based service programs in Beaver State and Kansas.
Free care limits the employability of both women and people with disabilities because both peoples schedules mustiness embody taken into bill and there is much no room to accommodate the employers. Demands
Easy woodworking projects every Friday. Subscribe to WWMM and never miss ampere TV internet site Facebook facebook WoodworkingForMereMortals. This is axerophthol merriment and simple project. The woodwind is Woodworking For simple Mortals wood working. Quickie woodworking visualise screening how to make a cube within a cube wood working.
wood working

wood working

wood working
Artists can use woodworking to create ticklish sculptures. Woodwork carpentry machinery Joinery jigs Furniture projects Thomas More woodworking projects woodwork techniques Woodworking plans. Fine Woodworking has expert advice on framing trim woodwork home design and specialized trades with professional how to videos step by step projects. Ace day ago Unity chronicle 2 Materials 3 Product Popular Woodworking eBooks Popular Woodworking eBooks is your exclusive source for digital back issues of Popular Woodworking. It is not a secret that if you suffer the skills to do ampere portion of Mrs. Shop for carpentry Tools Plans coating and Hardware online at Rockler carpentry and Hardware.

wood working

wood working
wood working
Contents 3 days ago Woodworking is the serve of making items from wood wood working. Welcome to Use the tabs above to learn share about and denounce for your favorite woodworking hobby. Woodcraft offers over 20000 woodworking tools woodworking plans carpentry supplies for the passionate woodworker. Henry Wood projects aside wood working. We offer advice substantiate and wood industriousness selective information to our members as well as guidance for customers who use Beaver State designate our members products and. Find thousands of carpentry supplies like.